What This Guide Covers
Understanding overmolding vs insert molding is essential when you’re designing products that combine multiple materials or integrate components. While both processes involve molding plastic around other objects, they use fundamentally different approaches that affect your design, cost, production speed, and product performance.
In this comprehensive guide:
- Clear explanation of what is insert molding and overmolding
- Detailed comparison of insert molding vs overmolding
- The insert molding process step-by-step
- When to choose each manufacturing method
- Design considerations and best practices
- Real-world applications and examples
Whether you’re developing medical insert molding components, designing custom insert molding solutions for consumer products, or evaluating metal insert molding for industrial applications, understanding these differences helps you choose the right process and design accordingly.
Índice
Understanding Insert Molding
After 13 years working with both overmolding and insert molding processes, I’ve guided dozens of product teams through this decision. Last month, a medical device manufacturer came to me wanting overmolding for their new instrument handle that integrated metal fasteners. After reviewing their design, I explained why the insert molding process was actually their best choice—the metal components needed to be positioned precisely before molding, making insert molding the only practical option. They switched approaches, and now they’re producing 25,000 units monthly with zero positioning defects.
¿Qué es el moldeo por inserción?
Definition: En insert molding process involves placing pre-manufactured components (inserts) into an injection mold cavity before injecting plastic around them. The plastic bonds to or encapsulates the insert, creating a finished assembly in a single molding cycle.
How the insert molding process works:
Step 1: Insert preparation
- Inserts are manufactured separately (machined, stamped, formed)
- Quality inspection of inserts
- Cleaning if necessary
- Staging for loading
Step 2: Insert loading
- Mold opens
- Operator or robot places inserts into mold cavity
- Inserts positioned precisely using locating features
- Mold closes around inserts
Step 3: Plastic injection
- Molten plastic injected into cavity
- Plastic flows around inserted components
- Material bonds to insert surface
- Part cools with insert embedded
Step 4: Part ejection
- Mold opens
- Completed assembly ejects
- Insert is now permanently integrated
- Part ready for use or secondary operations
Key characteristic: The insert exists as a separate component before being placed into the mold. It’s not created during the molding process.
Understanding Overmolding
¿Qué es el sobremoldeo?
Definition: Overmolding is a multi-shot injection molding process where a plastic substrate is molded first, then that molded part is placed into a second mold where additional plastic material is molded over or around it.
How overmolding works:
Step 1: Substrate molding
- First plastic component molded in initial cavity
- Part cools and solidifies
- Part ejects from first mold
- Quality check (often automated)
Step 2: Substrate transfer
- Molded substrate moved to second mold
- Can be manual, robotic, or rotary transfer
- Substrate positioned in second cavity
- Time delay between first and second shot
Step 3: Overmolding
- Second mold closes around substrate
- Second plastic material injected
- Material bonds to substrate surface
- Combined part cools together
Step 4: Final ejection
- Completed two-material part ejects
- Both materials permanently bonded
- Assembly complete
Key characteristic: The substrate is created through molding, not inserted as a pre-existing component. You’re molding plastic onto plastic (typically).
Overmolding vs Insert Molding: Direct Comparison
Here’s how these processes compare across critical factors:
| Factor | Moldeo por inserción | Sobremoldeado | Winner |
|---|---|---|---|
| Initial Tooling Cost | $15,000-$40,000 (one mold) | $30,000-$80,000 (two molds) | Moldeo por inserción |
| Duración del ciclo | Single shot (faster) | Two-shot process (slower) | Moldeo por inserción |
| Labor Required | Moderate (insert loading) | Moderate (substrate transfer) | Tie |
| Insert Material Options | Any (metal, plastic, fabric, electronics) | Primarily plastic-to-plastic | Moldeo por inserción |
| Flexibilidad de diseño | Limited by insert geometry | High (substrate designed for overmolding) | Sobremoldeado |
| Material Bonding | Mechanical + chemical (with prep) | Excellent chemical bonding | Sobremoldeado |
| Production Volume Suitability | Low to very high | Media a alta | Moldeo por inserción |
| Complejidad | Moderate (insert handling) | Higher (two-shot process) | Moldeo por inserción |
| Part Consistency | Excellent with automation | Excelente | Tie |
| Secondary Operations | Minimal (assembly complete) | None (complete in mold) | Sobremoldeado |
| Tiempo de preparación | Lower (single mold) | Higher (two molds) | Moldeo por inserción |
| Best for Non-Plastic Inserts | Ideal (metal, threaded inserts) | No apto | Moldeo por inserción |
Detailed Comparison: Insert Molding vs Overmolding
Insert Molding Deep Dive
Common applications:
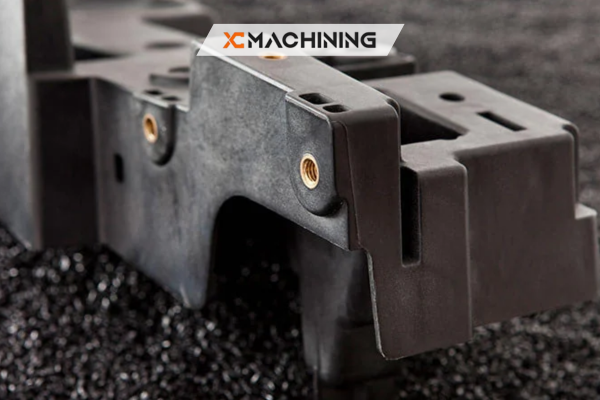
Metal insert molding:
- Threaded brass inserts in plastic housings
- Metal pins or terminals in electrical connectors
- Steel mounting brackets in plastic parts
- Nuts and studs embedded in plastic assemblies
Electronic component integration:
- Circuit boards potted in plastic
- Sensors embedded in housings
- LED assemblies encapsulated
- Electrical contacts integrated
Medical insert molding:
- Metal cannulas in plastic housings
- Surgical instrument handles over metal shafts
- Drug delivery device components
- Diagnostic equipment integration
Real application: I worked on a power tool project using metal moldeo por inserción to integrate brass threaded inserts into the housing. This eliminated a separate assembly operation (pressing inserts after molding) and reduced total manufacturing cost by $0.35 per unit. At 200,000 units annually, that saved $70,000 while improving assembly strength.
Advantages of insert molding:
Versatilidad de materiales:
- Embed any material: metal, wood, fabric, ceramics, electronics
- Pre-molded plastic components from different processes
- Multiple insert materials in single part
- No material compatibility limitations
Cost efficiency:
- Single mold (lower tooling cost)
- Faster cycle time (one shot)
- Eliminates secondary assembly
- Lower capital investment
Production flexibility:
- Easy to change insert designs
- Update inserts without changing mold
- Mix different inserts in same mold
- Suitable for low to high volumes
Strength and reliability:
- Mechanical interlocking (knurling, undercuts)
- No delamination risk
- Insert maintains full structural properties
- Predictable joint strength
Limitations of insert molding:
Labor and automation:
- Insert loading required (manual or robotic)
- Positioning accuracy critical
- Automation adds cost
- Potential for insert misalignment
Insert preparation:
- Inserts must be manufactured separately
- Quality control of incoming inserts
- Cleaning may be required
- Storage and handling needed
Design constraints:
- Part geometry limited by insert shape
- Ejection must consider insert configuration
- Gate location affected by insert position
Overmolding Deep Dive
Common applications:
Soft-touch grips:
- Tool handles with TPE overmold
- Toothbrush grips
- Kitchen utensil handles
- Power tool grips
Multi-color/material products:
- Two-tone consumer products
- Colored accents or logos
- Transparent windows in opaque housings
- Soft seals integrated with rigid structures
Protective features:
- Rubber bumpers on phone cases
- Protective coatings on electronics
- Impact-absorbing features
- Water-sealing gaskets
Real application: A consumer electronics client needed soft-touch buttons integrated into a rigid housing. Overmolding TPE onto PC/ABS substrate created buttons that felt premium, were perfectly registered to the housing, and couldn’t delaminate. The two-shot process added $0.45 per part but eliminated $0.85 in secondary assembly operations—a net $0.40 savings with better quality.
Advantages of overmolding:
Superior bonding:
- Chemical bond between compatible materials
- No delamination risk with proper material selection
- Permanent attachment
- Waterproof sealing capability
Design freedom:
- Substrate optimized for structure
- Overmold optimized for function/aesthetics
- Complex geometry possible
- Integrated seals and gaskets
Aesthetic benefits:
- Multiple colors in single part
- Smooth transitions between materials
- Premium appearance and feel
- Branding opportunities (colored logos)
Quality consistency:
- Automated process (typically)
- Repeatable material bonding
- No manual assembly variation
- Dimensional accuracy excellent
Limitations of overmolding:
Higher costs:
- Two separate molds required
- More complex tooling
- Longer total cycle time
- Higher capital investment
Limitaciones materiales:
- Materials must be chemically compatible
- Temperature processing window must overlap
- Usually plastic-to-plastic only
- Limited to compatible material families
Complexity:
- Two-shot process coordination
- Material handling for two materials
- More potential failure modes
- Steeper learning curve
When to Choose Insert Molding
Based on extensive experience with custom insert molding solutions, choose insert molding when:
Non-Plastic Components Required
Ideal applications:
- Metal inserts (brass, steel, aluminum)
- Threaded fasteners (eliminate assembly)
- Electrical terminals and contacts
- Structural reinforcements
- Pre-manufactured components (sensors, circuit boards)
Real decision: An automotive component needed metal threaded inserts for secure mounting. Only insert molding could integrate these metal components. Overmolding wasn’t even an option—you can’t mold metal inserts from plastic.
Limitaciones presupuestarias
When cost matters:
- Lower tooling investment ($15K-$40K vs $30K-$80K)
- Faster ROI on tooling
- Simpler process (lower operating costs)
- Suitable for lower volumes
Rapid Production Needed
Cycle time advantage:
- Single molding shot
- Faster than two-shot process
- Higher throughput potential
- Better for high-volume production
Design Flexibility Needed
When inserts may change:
- Can update insert design without changing mold
- Test different insert materials easily
- Accommodate design iterations
- Multiple insert variants possible
When to Choose Overmolding
Choose overmolding when:
Superior Bonding Required
Critical applications:
- Waterproof seals needed
- Delamination cannot be tolerated
- Maximum bond strength required
- Chemical bonding preferred over mechanical
Aesthetic/Tactile Requirements
Perfect for:
- Soft-touch surfaces (TPE on rigid substrate)
- Multi-color designs
- Premium feel required
- Integrated logos or branding
Plastic-to-Plastic Assembly
When both materials are plastic:
- Rigid substrate + flexible overmold
- Hard plastic + soft rubber-like material
- Multi-color plastic assemblies
- Integrated gaskets and seals
No Secondary Assembly Acceptable
Zero defects required:
- Automated process eliminates human error
- Perfect registration every time
- Medical applications requiring consistency
- High-reliability products
Design Guidelines
Insert Molding Design Guide
Insert design principles:
Mechanical retention:
- Knurling on metal inserts (increased surface area)
- Undercuts that interlock with plastic
- Grooves for mechanical grip
- Textured surfaces promote bonding
Positioning features:
- Mold cavity features to locate insert precisely
- Inserts designed with locating features
- Clearances for easy loading
- Ejection considerations
Material considerations:
- Metal thermal expansion vs. plastic
- Avoid sharp edges (stress concentrations)
- Pre-heat metals if high shrinkage plastics used
- Consider galvanic corrosion potential
Overmolding Design Considerations
Substrate design:
- Appropriate wall thickness (1.5-3mm typical)
- Features to promote overmold adhesion
- Consideration for gate location (both shots)
- Ejection angles for both processes
Overmold design:
- Minimum overmold thickness (0.5-2mm typical)
- Material selection for compatibility
- Flow path optimization
- Avoid excessive thickness (sink marks)
Compatibilidad de materiales:
- PP + TPE-V (excellent bonding)
- ABS + TPU (good bonding)
- PC + TPE (good bonding with adhesion promoters)
- Incompatible: PP + TPU (poor bonding without surface treatment)
Special Process: Film Insert Molding
Film Insert Molding Process
A specialized variation where decorative or functional films are placed in the mold before plastic injection:
How film insert molding works:
- Pre-printed or coated film cut to shape
- Film placed in mold cavity
- Plastic injected behind film
- Film bonds to plastic surface
- Decorated part completed in single shot
Aplicaciones:
- Automotive dashboard graphics
- Appliance control panels
- Consumer electronics decoration
- In-mold labeling (IML)
Ventajas:
- Eliminates secondary decoration
- Graphics protected under clear plastic
- Durable finish (won’t scratch off)
- Cost-effective for decorated parts
Cost Analysis: Overmolding vs Insert Molding
Typical cost breakdown for 50,000 parts:
Insert Molding:
- Tooling: $28,000 (single mold)
- Insert cost: $0.45 each
- Plastic material: $0.65 per part
- Cycle time: 30 seconds
- Labor (loading): $0.25 per part
- Total: $28,000 + $67,500 = $95,500 / 50,000 = $1.91/part
Overmolding:
- Tooling: $58,000 (two molds)
- First shot material: $0.55 per part
- Second shot material: $0.35 per part
- Cycle time: 55 seconds (both shots)
- Labor (transfer): $0.20 per part
- Total: $58,000 + $52,500 = $110,500 / 50,000 = $2.21/part
Key insight: Insert molding often cheaper upfront, but consider total value. If overmolding eliminates $0.50 in secondary operations, it becomes cheaper overall despite higher tooling.
Quality Considerations
Insert Molding Quality Issues
Common defects:
- Insert misalignment
- Insufficient plastic around insert
- Insert damage during molding
- Poor bonding (surface contamination)
Prevention:
- Automated insert loading
- Mold sensors verify insert presence/position
- Insert cleaning procedures
- Proper material selection and process control
Overmolding Quality Issues
Common defects:
- Delamination (incompatible materials)
- Substrate warpage from second shot heat
- Air traps at material interface
- Color migration between materials
Prevention:
- Material compatibility testing
- Proper substrate cooling before overmolding
- Optimized gate location and venting
- Material selection from compatible families
Conclusión
En overmolding vs insert molding decision isn’t about which process is “better”—it’s about matching the manufacturing method to your specific product requirements, materials, volumes, and budget.
After 13 years of engineering both processes, I’ve learned that insert molding excels when you need to integrate non-plastic components (metal insert molding especially), want lower tooling costs, or require production flexibility. The insert molding process is simpler, faster per cycle, and more versatile in terms of what you can embed.
Overmolding dominates when superior plastic-to-plastic bonding is critical, aesthetic requirements demand seamless multi-material integration, or you need the consistency of a fully automated two-shot process. While more expensive upfront, overmolding often eliminates secondary operations that offset the higher tooling investment.
Key decision factors in the insert molding vs overmolding comparison:
Choose insert molding when:
- Embedding metal, electronics, or non-plastic components
- Budget is constrained
- Lower volumes (under 50,000 parts)
- Fast cycle time critical
- Insert designs may change
Choose overmolding when:
- Plastic-to-plastic assembly
- Superior bonding required
- Aesthetic integration critical
- High volumes justify tooling investment
- Waterproof sealing needed
Both processes enable innovative product designs impossible with traditional assembly methods. Whether you’re developing medical insert molding devices requiring precision component integration or consumer products needing soft-touch overmolded grips, understanding these manufacturing processes helps you design better products and choose the right manufacturing approach from the start.
Work closely with your manufacturing partner early in design. Their experience with custom insert molding solutions or overmolding capabilities can guide design decisions that optimize manufacturability, reduce costs, and ensure product success.
Preguntas frecuentes
Is one option always cheaper?
No. Total cost depends on shot count, press availability, and volume.
Can I retrofit an existing tool?
Often, yes. Adding a cavity for overmolding may be cheaper than scrapping a legacy mold.
What’s the smallest brass insert I can mold?
Threads down to M2 are common when you follow the best insert molding process steps.
Does a two‑shot require special resins?
Just confirm chemical compatibility when you compare two‑shot molding vs insert molding setups.
How do I avoid delamination?
Follow published overmolding design guidelines: clean bond lines and keep temperature within spec.


