What This Guide Covers
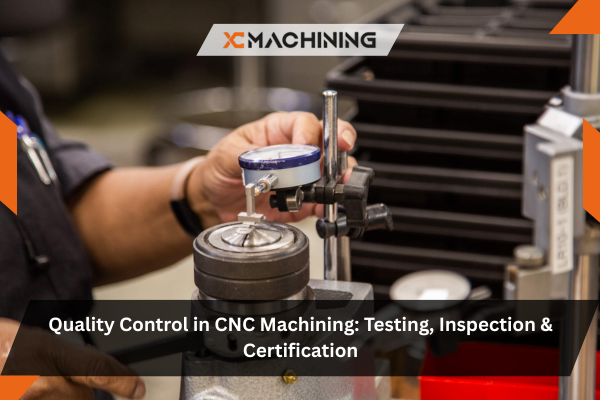
Quality control in CNC machining determines the difference between reliable, high-performing parts and expensive scrap. After 16 years implementing quality systems for precision CNC machining services across aerospace, medical, and automotive sectors, I’ve learned that effective quality control isn’t just about catching defects—it’s about preventing them from occurring in the first place.
In this comprehensive guide:
- Essential quality control processes for CNC machining
- Inspection methods and measurement techniques
- Industry certifications and standards
- Statistical process control implementation
- Real-world quality systems that work
- How to evaluate CNC machining services quality
Whether you’re managing custom CNC machining services, evaluating CNC milling and turning services providers, or searching for quality-certified stainless steel CNC machining services, understanding quality control fundamentals helps you make informed decisions and avoid costly quality failures.
Table des matières
Understanding Quality Control in CNC Machining
Last year, an automotive supplier came to me after a devastating recall. Their Services d'usinage CNC provider had shipped 12,000 brake components with a critical dimension out of tolerance by 0.003″—barely noticeable, but enough to cause premature wear and potential brake failure. The recall cost exceeded $2.8 million, destroyed their relationship with the OEM customer, and could have been prevented with proper quality control in CNC machining.
That incident exemplifies why quality control matters. In precision manufacturing, tolerances measured in thousandths of an inch determine success or catastrophic failure. Quality control in CNC machining encompasses every process from incoming material inspection through final part delivery, ensuring parts meet specifications consistently and reliably.
The Three Pillars of Quality Control in CNC Machining
Based on implementing quality systems across diverse operations, effective quality control rests on three foundational pillars:
1. Prevention (Design and Process Control)
Before chips fly, quality is built in:
Design for manufacturability (DFM):
- Tolerances appropriate for the process
- Geometric dimensioning and tolerancing (GD&T)
- Critical dimensions clearly identified
- Inspection points specified
Process capability studies:
- Verifying equipment can meet tolerances
- Understanding process variation
- Calculating Cpk values (process capability index)
- Establishing control limits
Standard work procedures:
- Documented setup instructions
- Proven tool lists and parameters
- Operator training and certification
- Change control processes
Real example: A precision CNC machining services company I worked with was experiencing 8% reject rates on a medical component. We conducted a capability study and discovered their machine couldn’t consistently hold the ±0.0005″ tolerance specified. By either relaxing the tolerance to ±0.001″ (customer approved) or moving to a more capable machine, rejects dropped to 0.4%.

2. Detection (Inspection and Measurement)
Catching defects before they reach customers:
In-process inspection:
- First article inspection (FAI)
- Critical dimensions checked during machining
- Statistical sampling plans
- Operator self-inspection
Final inspection:
- 100% inspection of critical features
- Statistical sampling of non-critical features
- Dimensional verification
- Visual and functional checks
Measurement equipment:
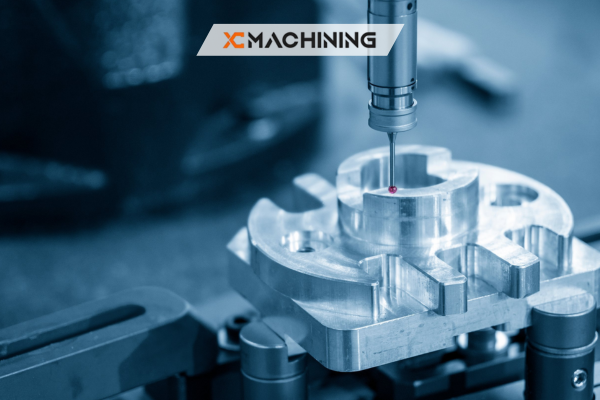
- Coordinate measuring machines (CMM)
- Optical comparators
- Calipers, micrometers, height gauges
- Surface finish measurement
- Hardness testing equipment
3. Correction (Continuous Improvement)
Learning from defects to prevent recurrence:
Root cause analysis:
- Why defects occurred
- Process failure modes
- Corrective action implementation
- Verification of effectiveness
Statistical process control (SPC):
- Monitoring process trends
- Detecting shifts before defects occur
- Adjusting processes proactively
- Documenting improvements
Essential Inspection Methods
Quality control in CNC machining employs various inspection techniques depending on part requirements:
Dimensional Inspection
Coordinate Measuring Machine (CMM):
- Precision: ±0.0001″ typical
- Measures complex 3D geometries
- Generates inspection reports automatically
- Best for: Complex parts, tight tolerances, first article inspection
Real application: For aerospace components requiring AS9100 certification, CMM inspection with documented results is often mandatory. A CNC machining services georgia facility I consulted with invested $85,000 in a CMM, which enabled them to bid on aerospace work worth $1.2 million annually—justified the investment in 9 months.
Optical Comparator:
- Projects magnified part silhouette
- Measures profiles and angles
- Fast for 2D features
- Best for: Simple geometries, quick checks, high-volume inspection
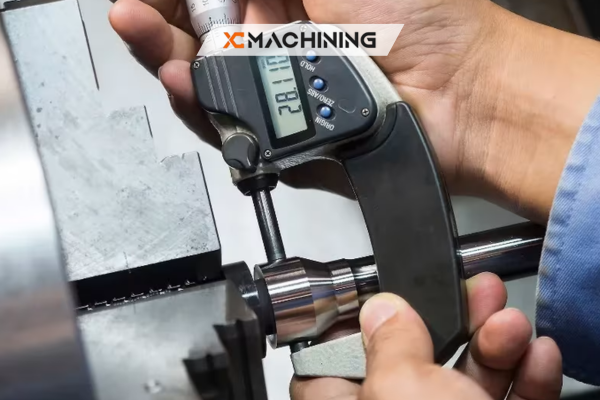
Hand Tools (Calibrated):
- Calipers, micrometers, pin gauges
- Precision: ±0.0001″ for quality micrometers
- Portable and flexible
- Best for: In-process checks, simple dimensions, operator verification
Surface Quality Inspection
Surface roughness measurement:
- Ra (average roughness) measurement
- Critical for sealing surfaces and bearings
- Specified in microinches or micrometers
- Measured with profilometer or comparator
Visual inspection:
- Defects: burrs, scratches, tool marks, discoloration
- Standardized lighting and inspection criteria
- Documented with photos when needed
- Best for: Cosmetic surfaces, obvious defects
Vérification des matériaux
Material certification:
- Mill test reports for raw material
- Chemical composition verification
- Heat treat certifications
- Traceability documentation
Hardness testing:
- Rockwell, Brinell, or Vickers scales
- Verifies heat treatment effectiveness
- Critical for wear-resistant parts
- Non-destructive testing method
Quality Control Standards and Certifications
Different industries require specific quality management systems:
| Standard | L'industrie | Requirements | Typical Audit Frequency |
|---|---|---|---|
| ISO 9001 | General manufacturing | Quality management system, documentation, continuous improvement | Annual |
| AS9100 | Aérospatiale | ISO 9001 + aerospace-specific requirements, FOD control, traceability | Annual + spot audits |
| ISO 13485 | Dispositifs médicaux | ISO 9001 + medical-specific requirements, risk management, design controls | Annual |
| IATF 16949 | Automobile | ISO 9001 + automotive requirements, PPAP, APQP, FMEA | Annual + customer audits |
| ISO 17025 | Testing/calibration labs | Measurement accuracy, calibration programs, uncertainty analysis | Biennial |
| NADCAP | Aerospace special processes | Specific process certifications (heat treat, NDT, etc.) | 12-24 months |
Selecting CNC Machining Services by Certification
Questions to ask potential providers:
- What quality certifications do you hold?
- Can you provide recent audit results?
- What’s your reject/rework rate?
- How do you handle non-conforming material?
- What measurement equipment do you have?
- Can you provide capability studies for critical dimensions?
Red flags:
- Can’t provide certification documentation
- Vague answers about quality processes
- No documented inspection procedures
- Inadequate measurement equipment
- Reluctance to discuss reject rates
Statistical Process Control (SPC) in CNC Machining
Statistical process control transforms quality control in Usinage CNC from reactive inspection to proactive prevention.
SPC Fundamentals
Control charts:
- Monitor critical dimensions over time
- Establish upper and lower control limits
- Detect trends before defects occur
- Enable predictive adjustments
Process capability metrics:
Cp (Process Capability):
- Compares process variation to tolerance width
- Cp ≥ 1.33 generally required for critical dimensions
- Assumes process is centered
Cpk (Process Capability Index):
- Accounts for process centering
- Cpk ≥ 1.33 indicates capable process
- Cpk < 1.0 means process cannot meet specification
Calculation example:
Tolerance: 2.000" ±0.005"
Process produces parts: 1.997" to 2.002" (±0.0025" variation)
Cpk = (Tolerance width) / (6 × standard deviation)
Cpk = 0.010 / (6 × 0.0008) = 2.08 (Highly capable process)
Real implementation: A custom CNC machining services shop I worked with implemented SPC on their most critical operations. By monitoring trends, they caught a tool wear issue that would have produced 200 out-of-tolerance parts. Instead, they replaced the tool proactively, producing zero defects. Over 12 months, their scrap rate dropped from 3.2% to 0.6%—saving $47,000 annually.
SPC Implementation Steps
1. Identify critical dimensions
- Dimensions affecting function
- Dimensions affecting fit
- Customer-specified critical features
2. Establish baseline capability
- Measure current process performance
- Calculate Cp and Cpk
- Verify equipment capability
3. Create control charts
- Set control limits (typically ±3 sigma)
- Define sampling frequency
- Train operators on chart interpretation
4. Monitor and respond
- Plot measurements regularly
- Investigate out-of-control conditions
- Adjust processes proactively
- Document actions taken
5. Continuous improvement
- Analyze trends for improvement opportunities
- Reduce variation systematically
- Update control limits as process improves

First Article Inspection (FAI)
First article inspection is a comprehensive dimensional inspection of the first part(s) from a new setup, verifying all dimensions, features, and specifications before production begins.
FAI Process
Complete dimensional inspection:
- Every dimension on the drawing
- All GD&T callouts verified
- Material verification
- Surface finish measurement
- Functional testing (if applicable)
Documentation :
- AS9102 forms for aerospace
- PPAP documentation for automotive
- Photos and measurement data
- Material certifications
- Process documentation
Approval process:
- Internal review and approval
- Customer review (if required)
- Documentation retention
- Release for production
When FAI is required:
- New part number (first time manufacture)
- Engineering change affecting dimensions
- Process change (new machine, different setup)
- After tooling repair or modification
- After extended production pause (typically >2 years)
Real requirement: For aerospace parts, AS9102 first article inspection is mandatory. A CNC machining services near me georgia supplier I audited didn’t understand this requirement and shipped parts without proper FAI. The aerospace customer rejected the entire lot (850 parts worth $127,000) and required complete FAI before accepting any parts. Lesson learned: understand your customer’s quality requirements before production begins.
Quality Control for Different Materials
Different materials in precision CNC machining services require specific quality considerations:
Usinage CNC de l'aluminium
Key quality concerns:
- Softness can cause measurement errors (clamping pressure affects dimensions)
- Burr control critical for sharp edges
- Surface finish affected by cutting parameters
- Anodizing thickness verification (if specified)
Inspection considerations:
- Measure at room temperature (thermal expansion)
- Use appropriate clamping force
- Check for burrs and sharp edges
- Verify surface treatments
Stainless Steel CNC Machining Services
Key quality concerns:
- Work hardening affects dimensional control
- Surface finish challenges
- Passivation verification
- Hardness testing after heat treatment
Inspection considerations:
- Surface finish measurement critical
- Verify passivation effectiveness
- Check for heat-affected zones
- Measure hardness if heat treated
CNC Plastic Machining Services
Key quality concerns:
- Thermal expansion greater than metals
- Moisture absorption affects dimensions
- Static electricity attracts contaminants
- Surface scratching during handling
Inspection considerations:
- Temperature-controlled environment for measurement
- Humidity-controlled storage
- Anti-static measures
- Protective handling procedures
Building a Quality Culture
The best quality control in CNC machining comes from a culture where everyone prioritizes quality:
Operator Empowerment
Training and certification:
- Blueprint reading and GD&T understanding
- Proper use of measurement equipment
- When to stop production and alert supervision
- Root cause analysis participation
Authority to reject:
- Operators empowered to stop production
- Quality issues escalated immediately
- No pressure to ship questionable parts
- Recognition for catching issues
Real culture: The best CNC milling and turning services facility I’ve worked with gives every operator a red button that stops production if they see a quality issue. Management response time is under 5 minutes. This culture of “quality first” resulted in a 94% on-time delivery rate with 99.2% first-pass quality—industry-leading performance.
Management Commitment
Resources for quality:
- Investment in measurement equipment
- Training budget and time
- Quality personnel at appropriate levels
- Process improvement time allocated
Quality metrics:
- Reject rates tracked and visible
- Customer returns monitored
- Corrective action effectiveness
- Process capability trends
Advanced Quality Techniques
Leading precision CNC machining services providers employ advanced techniques:
In-Process Monitoring
Tool wear monitoring:
- Acoustic emission sensors
- Force sensors
- Laser tool measurement
- Predictive tool replacement
Dimensional monitoring:
- In-machine probing systems
- Automatic offset adjustment
- 100% inspection capability
- Real-time SPC
Avantages :
- Catch issues immediately (not at final inspection)
- Reduce scrap and rework
- Enable lights-out manufacturing
- Improve process capability
Automated Inspection
Vision systems:
- Automated dimensional checks
- Defect detection (scratches, burrs)
- 100% inspection at production speed
- Objective, repeatable results
Automated CMM:
- Programmed inspection routines
- Faster than manual inspection
- Consistent measurement technique
- Integration with SPC systems
Evaluating Quality: Practical Metrics
When evaluating custom CNC machining services providers, these metrics indicate quality system effectiveness:
| Metric | Excellent | Bon | Pauvre | Red Flag |
|---|---|---|---|---|
| First Pass Yield | >98% | 95-98% | 90-95% | <90% |
| On-Time Delivery | >95% | 90-95% | 85-90% | <85% |
| Customer Return Rate | <0.5% | 0.5-1.0% | 1.0-2.0% | >2.0% |
| Cpk (Critical Dims) | >1.67 | 1.33-1.67 | 1.0-1.33 | <1.0 |
| Internal Reject Rate | <2% | 2-4% | 4-6% | >6% |
| Corrective Action Closure | <30 days | 30-60 days | 60-90 days | >90 days |
Conclusion
Quality control in CNC machining isn’t a single activity—it’s a comprehensive system integrating prevention, detection, and correction throughout the manufacturing process. After 16 years implementing quality systems, I’ve learned that the most successful precision CNC machining services providers don’t just inspect quality in; they build quality into every process step.
Effective quality control starts with capable equipment and proven processes, continues through disciplined in-process and final inspection, and closes with continuous improvement driven by data analysis. The best organizations employ statistical process control, empower operators to stop production when issues arise, and invest in measurement equipment and training.
When evaluating CNC machining services—whether local providers offering CNC machining services georgia or specialized stainless steel CNC machining services or CNC plastic machining services—quality certifications provide baseline assurance, but dig deeper. Ask about reject rates, process capability, measurement equipment, and quality culture. The cheapest quote often becomes the most expensive option when quality failures occur.
For manufacturers, investing in quality control in CNC machining pays dividends through reduced scrap, fewer customer returns, better on-time delivery, and stronger customer relationships. A robust quality system costs money upfront but saves multiples of that investment by preventing the catastrophic failures that destroy margins and reputations.
Quality isn’t expensive—it’s priceless. The question isn’t whether you can afford good quality control in CNC machining; it’s whether you can afford the alternative.
FAQ
- How often should measuring tools like calipers and micrometers be calibrated?
Most shops calibrate handheld gauges every six months, while high-precision tools such as CMM probes get checked monthly or after any hard drop. - What does a CMM actually do on the shop floor?
A coordinate-measuring machine scans parts with a probe or laser, then compares the 3-D data to the original CAD file to verify size, shape, and position. - Why is surface roughness, shown as Ra, so important?
A lower Ra value means a smoother surface, which reduces friction, lowers wear, and helps coatings or seals stick better to the part. - How can I spot tool wear before it ruins parts?
Monitoring spindle power and vibration, plus regular visual checks under magnification, helps detect dull edges early so cutters can be changed on time. - What is the main benefit of using SPC charts in machining?
Statistical Process Control shows small shifts in data long before parts go out of spec, letting teams correct the process and cut scrap rates.


