Have you ever printed a 3D part that didn’t quite fit together the way you expected? Maybe the holes were too tight, or the edges didn’t match your design. That’s often the result of 3D printing tolerances. When tolerances are off, your parts might warp, crack, or simply fail to meet specifications.
The solution is to pay close attention to 3D printing tolerances parameters. Focus on how layer height, material choice, and calibration settings can influence part dimensions. Optimize these factors with the steps:
- Calibrate your printer regularly.
- Choose suitable materials.
- Adjust design features.
- Test and measure frequently.
In this article, we’ll discuss why tolerances matter, how they influence both manufacturing and product development, and the best practices to ensure your prints come out perfect.
3D Printing Tolerances: The Key To Successful Parts
Bumps, gaps, or errors can throw a project off course. That’s why 3D printing tolerances are so crucial. Getting these tolerances right sets the stage for parts that fit properly and function as intended. Each material and printer type can shift outcomes, making accurate tolerance design more important than ever.
Understand The Core Constraints
3D printers rely on layer-by-layer building. Material flow, temperature, and other factors dictate dimensions. These elements vary; parts may come out bigger or smaller than intended. Constraints are the backbone of precision; it pays to keep an eye on them.
Material Behavior Matters
Plastics shrink as they cool, metals may warp, and resins can shift under UV lights. Each material behaves differently once printed. Accounting for expansion and contraction is crucial. Overlooking these changes leads to misaligned features, poor fits, and wasted builds.
Post-Processing Impacts Fit
Some finishing steps, like sanding or heat-treating, can change part size. Removing just a tiny fraction of material might ruin a tight fit. Polishing layers down far can also create gaps. Always include post-processing adjustments when you plan your tolerances.
Understanding Accuracy Vs. Precision
Accuracy refers to how close your printed dimensions are to the intended design. Precision relates to how consistently your printer reproduces those dimensions every time. A printer can be precise but not accurate, or vice versa. In manufacturing, both traits matter for consistent, reliable parts. That’s the core difference, indeed.
Understanding this difference helps you pinpoint the exact source of a problem. If your parts randomly come out in different sizes, you lack precision. If they’re always off by the same amount, you lack accuracy. Tackle each issue separately by adjusting design, firmware settings, or calibration methods. Focus on details seriously.
Material Considerations For Tolerance
Not all materials behave the same way. PLA prints easily but can become brittle over time, while ABS is tougher yet prone to warping. Resins have higher resolution but require careful curing. Each of these materials affects how tight your tolerances can be without sacrificing strength or stability for success.
High-temperature plastics like polycarbonate can yield strong parts but need specific printer modifications. Metals printed via powder-bed fusion demand even stricter environmental controls. Soft, flexible filaments may require over-extrusion compensation. Knowing each material’s quirks lets you set realistic expectations for dimensional accuracy and avoid costly print failures. Every choice counts.
The Role Of Slicer Settings
Your slicer transforms 3D models into instructions for the printer. Layer height, infill percentage, and print speed are all impact tolerances. Too high a speed can introduce vibration, leading to dimensional errors. Meanwhile, using a larger layer height can cause stair-stepping effects, altering final measurements in subtle ways. It matters greatly.
Temperature settings in your slicer also affect tolerances. Overheating can make filament ooze or droop, changing the part’s geometry. Cooling too fast risks layer adhesion issues, causing potential distortions. Fine-tuning all these parameters is a balancing act that ensures a more accurate part, exactly as designed. Precision is everything here.
Calibration Strategies
Proper calibration is key to achieving tighter 3D printing tolerances. Start by checking your steps-per-millimeter settings. If these are off, every axis moves incorrectly, leading to dimension errors. Next, verify your extrusion multiplier so filament flow matches slicer expectations. Even a small mismatch can lead to big deviations. Test regularly.
Bed leveling also counts. An uneven bed can squash or stretch the first layers, shifting the final dimensions. Temperature calibration is another big factor, especially for materials that melt at higher points. Consistent heat distribution means layers bond well without overspreading, ensuring the part matches your digital blueprint. Smooth prints follow.
Design Adjustments For Fit
Designing parts with intended tolerances is a proactive approach. Consider adding small offsets for holes or snap-fit joints if you know your printer tends to print slightly oversized. Incorporate chamfers or fillets to ease assembly. Minor changes at the design stage can save hours of reprinting later. Plan from the start.
Overlapping parts in assemblies also demand thoughtful design. Provide clearances to account for real-world inconsistencies. Too tight a tolerance can lock pieces together when you need them separate. Too loose, and your assembly wobbles. Analyze each mating surface to decide how much wiggle room will keep everything functional. Think carefully.
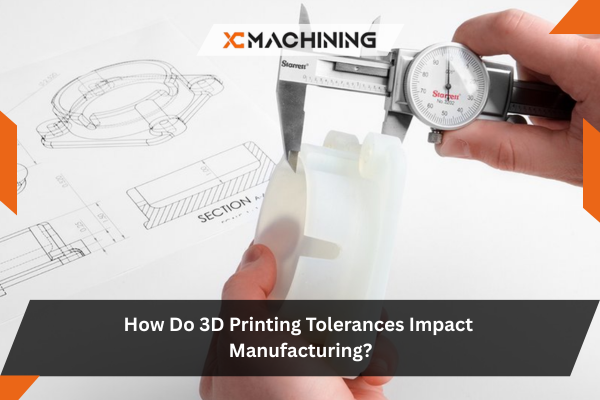
Dimensional Checks And Quality Control
Quality control starts with measuring your parts against their CAD files. Digital calipers or micrometers help you confirm thicknesses, diameters, and overall geometry. If you spot consistent undersizing or oversizing, adjust your printer settings or update your design. Keep track of these data points for continuous improvement. Accuracy remains vital.
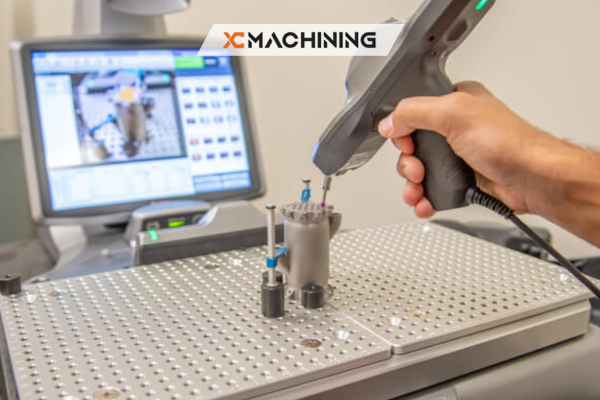
Some companies use advanced scanning systems for critical parts, generating color maps of deviations from the original model. For general hobby projects, a simple set of measurements can do the trick. The main goal is to identify patterns and fix them before mass production or final usage. Quality saves time.
Scaling Factors
Sometimes, the easiest fix is to scale your model slightly. If prints come out 1% too small, increase the scale by 1%. This trick compensates for consistent shrinkage or growth.
However, scaling changes every dimension, not just the one you intended. Use this method cautiously and confirm with test prints.
Below is a quick reference for scaling adjustments:
| Issue | Suggested Adjustment |
|---|---|
| PLA prints undersized | Increase by 0.5-1% |
| ABS warps on edges | Increase by ~1-2% |
| Resin shrinks post-curing | Increase by ~1% |
Always verify with actual measurements for best results.
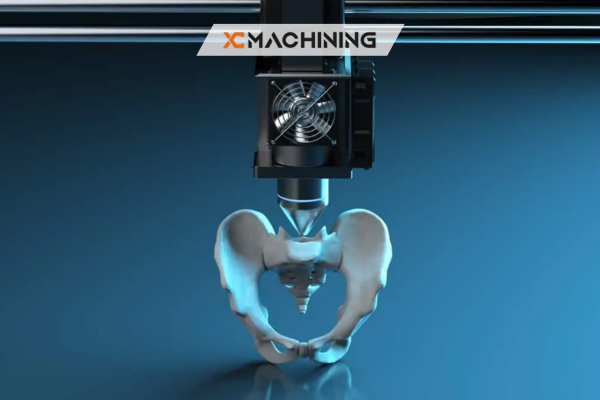
Tolerances In Different 3D Printing Methods
FDM printers often have layer lines that affect fine details. SLA or resin-based methods achieve smoother surfaces but may have shrinkage issues during curing. SLS sinters powder with lasers, which can lead to slightly rough textures. Each method introduces unique tolerance challenges that designers must factor into their plans. Careful consideration helps.
Binder jetting involves gluing powder together, so part strength might be lower unless you infiltrate or sinter afterward. Multi-jet fusion gives good detail but demands stable environmental conditions. With each technology, the interplay of heat, material, and machine mechanics defines the limits of acceptable tolerances. Choose wisely for consistent results.
Cost Impact Of Tighter Tolerances
As 3D printing tolerances get tighter, costs can rise. You may need specialized materials or advanced machines with better resolution. Slower print speeds become necessary to maintain precision, increasing labor and operational expenses. Balancing the benefit of higher accuracy against the cost is crucial for any project. Plan your budget.
Sometimes, a slight compromise on precision can lower printing time. For non-critical parts, adopting a moderate tolerance helps avoid waste. Additionally, fewer design revisions are required when you’re not chasing ultra-tight specs. Finding that sweet spot between performance requirements and finances is vital for sustainable product development. Think efficiency first.
Impact On Mass Production
When you move from prototyping to large-scale manufacturing, tolerance consistency becomes more urgent. A small deviation repeated thousands of times can lead to major assembly failures or product returns. Ensuring every print meets the same specification reduces the risk of flawed batches and unhappy customers. Efficiency, quality, and trust matter.
Moreover, scaling up means dealing with potential machine-to-machine variances. One printer might run hot, and another might have a slightly off nozzle diameter. Standardizing calibration procedures across all printers is crucial. This uniformity ensures each part rolling off the line meets your design’s required tolerance, upholding brand reputation. It fosters consistency.
Functional Prototyping
Prototypes aren’t just visual models; they also test real-world functionality. For moving parts or mechanical assemblies, tolerances determine whether everything slides, rotates, or hinges smoothly. Even if it’s a one-off prototype, achieving accurate dimensions can predict future performance and identify design flaws before full-scale production. That’s invaluable feedback, indeed.
Designers often iterate multiple times, refining each version’s tolerance to fix any snag. A slightly smaller hole or bigger slot can turn a failing prototype into a reliable final product. By focusing on tolerances early, you minimize back-and-forth changes and keep development schedules on track. Better designs save time fast.
Post-Processing Effects
Post-processing can alter 3D printing tolerances if you’re not careful. Sanding, vapor smoothing, or chemical treatments all remove or reshape surfaces. Each pass of sandpaper can eat away at critical dimensions, potentially spoiling a once-perfect fit. Knowing how much post-processing changes geometry is vital for accurate final results. Plan accordingly.
Heat-treating can cause slight expansion or contraction, depending on the material. Painting or coating adds thickness that may close tiny gaps. Always factor in these modifications when designing and printing parts. A well-planned post-processing routine supports a predictable outcome, ensuring your finished model beautifully lives up to your digital design.
Common Pitfalls
Overlooking small errors early on can compound into bigger issues later. Relying solely on manufacturer data sheets for shrinkage rates might mislead you since real-world conditions vary. Another pitfall is ignoring how different filaments from the same brand can behave differently. Testing each batch is a smart habit. Double-check everything.
Some designers forget to re-check 3D printing tolerances after a slicer update. New algorithms can change how layers stack, shifting dimensions. Also, failing to store filament properly leads to moisture absorption, causing inconsistent extrusion. Each overlooked detail can push your final print outside the acceptable range, wasting time and materials. Stay vigilant.
Collaborating With Manufacturers
If you’re outsourcing your 3D prints, communication is crucial. Provide detailed CAD files with specified tolerances so manufacturers understand your needs. Ask about their machine capabilities, recommended materials, and past experiences. A good manufacturer will guide you on feasible tolerances and suggest design tweaks if necessary. Discuss timelines upfront early.
Some companies specialize in tight-tolerance prints, while others focus on bulk production with looser specs. Align your project’s goals with a partner who has the right expertise. Provide feedback on test samples so they can refine their process. This relationship fosters better outcomes and reduces costly miscommunications. Collaboration drives success.
Conclusion
In summary, 3D printing tolerances decide whether precise parts function or flop under pressure. By calibrating printers, choosing the right materials, and accounting for post-processing, you can achieve consistent, accurate results. As the scale of your project grows, fine-tuning tolerances become even more essential. Aim always for a balance between cost, performance, and reliability.
FAQs
How do we measure tolerances?
Use digital calipers or micrometers at multiple points. Compare results to your CAD file for consistency. Adjust slicer or printer settings if errors repeat. Document these measurements to detect trends over time. Calibration remains crucial for accurate parts that align with your intended design dimensions. Be thorough.
What is the best technology for it?
SLA and DLP excel in detail due to precise lasers or projectors. SLS can deliver stability but faces minor powder inconsistencies. FDM, with correct tuning, achieves decent tolerances but typically larger layer lines. The ideal choice depends on budget, application, and how fine your parts are. Exactly.”
Should it be too tight/loose?
Consider slight design changes. Increase or decrease hole diameters or tweak slot widths. Adjust the extrusion multiplier to correct under or over-extrusion. Scaling the entire model by a small percentage can help. Always recheck dimensions after modifications to confirm you’ve reached an acceptable fit for each part. It’s easy enough.


