
Have you ever wondered how plastic objects seem to appear almost from thin air in some manufacturing labs or hobbyist’s workshops? Maybe you’ve heard about 3D printing technology but aren’t quite sure what goes on behind the scenes. If you’re curious about the nuts and bolts of creating solid objects layer by layer, you’re in the right place. In this article, we’ll answer the question, How Does a 3D Printing Machine work, and take a deep dive into the process.
In the rest of this article, we’ll explore each stage of How Does a 3D Printing Machine operate, from the digital design phase to the final printed piece. We’ll also look at different printing methods, tips for better prints, and some common pitfalls to avoid.
3D Printing Machine: A Glimpse Into Modern Manufacturing
This technology transforms computer designs into physical objects through an additive process. The machine deposits or fuses material layer by layer, guided by coded instructions. As each new layer forms, the object slowly gains height until it reaches the final shape. You can print anything from decorative figurines to functional prototypes.
Filament-Fed Extrusion (FDM)
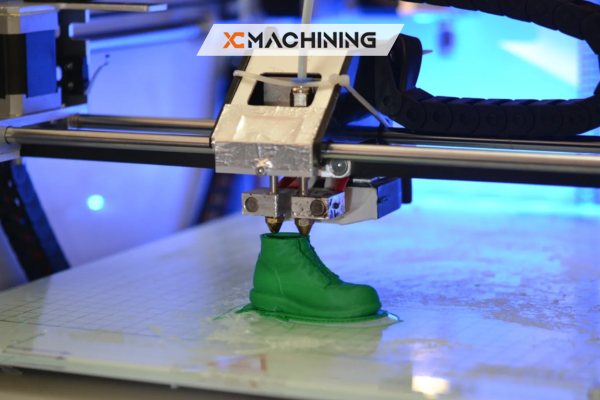
Many 3D printing machines use Fused Deposition Modeling (FDM), which involves melting a plastic filament and extruding it through a heated nozzle to build objects line by line. The filament solidifies quickly in contact with cooler air or a build platform.
Laser-Based Sintering
Other printers rely on high-powered lasers to fuse powdered material into solid layers. Two common methods include:
- Selective Laser Sintering (SLS): Uses a laser to fuse powdered plastics like nylon into complex and durable parts.
- Selective Laser Melting (SLM): A similar process, but designed specifically for metal powders, creating strong, fully dense metal parts.
After each layer fuses, fresh powder spreads on top, and the process repeats until a complete object takes form.
Resin Curing
Certain printers work with liquid resin. A light source hardens specific areas of the resin, layer by layer, to form the final solid. This approach allows very fine detail and smooth finishes. Two common methods include:
- Stereolithography (SLA): Uses a UV laser to cure liquid resin with extreme precision.
- Multi Jet Fusion (MJF): A powder-based method that applies fusing and detailing agents before heating the material to form parts with excellent mechanical properties.
Computer-Aided Design (CAD)
Most 3D printing projects begin with a digital blueprint. You can create models in CAD software or download ready-made ones from online libraries. The 3D printing machine needs these files to plot each layer accurately.
Steps in the CAD Process:
- Drafting the Model: Shape your concept using CAD tools.
- Saving the File: Common formats include STL and OBJ.
- Slicing Software: Converts the file into a series of layers, generating G-code instructions for the printer.
Advanced software can detect thin walls or overhangs that may cause printing issues, guiding you to fix them before starting. Simple designs might take minutes to model, but complex assemblies can require extensive CAD expertise. Either way, this digital step is crucial, as the printer follows these instructions to the letter, ensuring accurate results. With advanced software, even the most intricate details are captured, avoiding potential issues that could arise during printing.
Slicing: The Secret Sauce
Your 3D printing machine won’t just read the raw STL file and start printing. A slicer program is needed to break that 3D model into a stack of 2D slices. These slices act as the blueprint for each layer.
How Slicing Works:
- Import the CAD model into slicing software.
- Choose settings like layer height, infill percentage, and supports.
- Generate a G-code that maps out each layer’s movements, extruder temperatures, and speeds.
Infill Patterns:
The internal structure that supports your object. A high infill percentage yields stronger prints but takes longer. A honeycomb or cubic pattern can strike a balance between strength and time.
Supports:
Overhanging sections need temporary support. You can print these scaffolds using the same material or a different soluble one that dissolves post-print. Slicers let you customize support density, ensuring material efficiency, which is crucial when working with scaffolds that require temporary support during printing. Adjusting the support structure can optimize the printing process, making the temporary support more effective..
Printing Materials and Variations
Not all 3D printers use the same feedstock. Some rely on plastic filaments, while others handle liquid resin or even metal powders. The kind of 3D printing machine you have will dictate your material options and printing method.
Thermoplastics (FDM, MJF, SLS):
Filament-based machines commonly use PLA, ABS, PETG, or nylon. PLA is beginner-friendly and biodegradable, while ABS is tougher but trickier to handle due to warping. Each plastic type has unique characteristics like flexibility or heat resistance.
Resins (SLA, DLP):
Stereolithography (SLA) or DLP printers cure liquid resin with UV light. These resins can produce highly detailed models, but they require post-processing and are generally more expensive per print compared to filaments.
Metals and Ceramics (SLM, MJF):
Industrial 3D printing machines can fuse metal powders into fully dense parts. It’s a game-changer for the aerospace or automotive industries. Some niche printers even handle ceramic pastes, opening doors to artistic and engineering applications.
Core Components of a 3D Printer
While many designs exist, most 3D printing machines share a few essential parts:
Extruder/Print Head:
For filament-based printers, the extruder pulls filament from a spool and feeds it into a heated nozzle. How Does a 3D Printing Machine work? The molten plastic then extrudes layer by layer. Resin printers, however, replace the extruder with a laser or projector that cures liquid resin.
Build Platform:
This is where each new layer is laid down. Some platforms are heated to help plastic adhere and prevent warping. Resin printers dip a build plate into a vat, lifting the part as each new layer is cured.
Motion System:
Stepper motors move the extruder or build plate along the X, Y, and Z axes. Accuracy depends on how precisely these motors can position each layer.
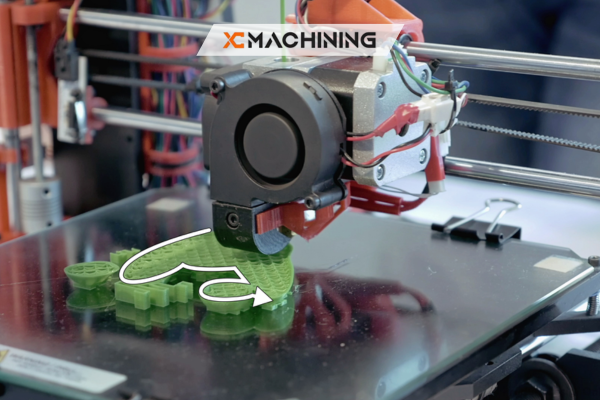
Layer-By-Layer Deposition
A hallmark of 3D printing is layering. The machine deposits or solidifies one thin layer at a time, eventually stacking up to form the final object.
Layer Height
Layer height determines surface smoothness and print speed. Thinner layers capture finer details but prolong print time. Thicker layers speed up the process but can leave visible lines.
Z-Axis Movement
After each layer is complete, the build platform lowers (or the extruder lifts) by one layer’s thickness. This incremental approach continues until the part is done. Some printers do this hundreds or thousands of times for tall or detailed projects.
Cooling And Solidification
As new plastic extrudes, it must cool and solidify before the next layer. Improper cooling can lead to drooping edges or poor layer adhesion. Some machines have built-in cooling fans or blowers to help.
Cooling Fans
A targeted fan near the nozzle helps solidify plastic quickly. But you must balance cooling with proper layer bonding. Turning the fan up too high can cause layers to separate or warp.
Material-Specific Behavior
For PLA, quick cooling usually works well. ABS, on the other hand, prefers a more controlled environment to avoid cracking. That’s why many ABS printers feature enclosed chambers that maintain a stable temperature.
Print Speed And Quality Trade-Off
“How fast can a 3d printing machine go?” is a common question. Pushing speed often reduces detail or surface finish. If you want high resolution, prepare for lengthier print times.
Travel Speed Vs. Extrusion Speed
Travel speed measures how quickly the print head moves when not extruding material. Extrusion speed indicates how fast plastic deposits on each pass. Many printers let you tweak these speeds independently.
Shells And Perimeters
Outer walls or shells define the final appearance. Slowing down on perimeters yields cleaner surfaces, while faster infill speed can fill the interior quickly. Adjusting this balance helps achieve a decent look without overly long cycles.
Common Printing Methods
Different 3D printing machines rely on diverse principles, but the end goal remains the same: turn digital designs into physical objects.
Fused Deposition Modeling (FDM)
FDM machines melt and deposit thermoplastic through a nozzle. Popular in home and hobbyist setups, they’re relatively affordable and easy to use. Filament spools feed the extruder layer by layer.
Stereolithography (SLA)
SLA printers cure liquid resin using a UV laser or projector. They’re known for high resolution and smooth finishes. Post-processing typically includes rinsing in solvent and a final UV cure to fully harden the part.
Selective Laser Sintering (SLS)
Using a laser beam to fuse powder, SLS printers build parts in a bed of powder. When one layer finishes, fresh powder spreads, and the laser sinters the next. No separate support structures are needed, as unsintered powder surrounds the object.
Post-Processing And Cleanup
When a 3D print finishes, you’re not always done. Some methods require additional steps to get a final, polished result.
Support Removal
If your part needs support, carefully snap or cut them away. In resin prints, you might also remove supportive scaffolding. Too much force can damage delicate features, so proceed gently.
Sanding And Polishing
Many prints have visible layer lines or rough spots. A bit of sanding or buffing can yield a smoother finish. You can also apply filler primer to paint. This step is common if you want a professional-grade look.
Curing And Drying
SLA or DLP prints need thorough UV curing after printing to reach full strength. Powder-based parts may require brushing or blasting off any loose powder. Each process ensures the part hits the final mechanical and aesthetic quality.
Troubleshooting Print Failures
Not every print emerges perfectly. You might face curling corners, under-extrusion, or random spaghetti messes. Spotting the root cause can save frustration and wasted filament.
Bed Adhesion Issues
If the first layer doesn’t stick, your model might warp or detach midway. Solutions include leveling the bed, increasing bed temperature, or adding adhesive aids like tape or glue sticks.
Under-Extrusion
When the machine can’t push enough filament, layers look thin or have gaps. Check if your nozzle is clogged or if the feeder tension is too loose. Also, verify that the temperature is high enough to melt the filament well.
Layer Shifts
Sometimes, your model shifts partway up, creating a skewed shape. This often stems from belt slippage or missed steps in the stepper motors. Ensure belts are tight and motors aren’t overloaded.
Info: Keep a “failure log.” Writing down each print issue and solution helps you learn from mistakes, fine-tune settings, and avoid repeat problems.
Best Practices For Consistent Results
Regular upkeep and mindful printing habits can ensure your 3d printing machine churns out reliable parts time after time.
Bed Leveling
A properly leveled bed fosters uniform first-layer adhesion. Some printers include auto-bed-leveling sensors, but manual checks with a sheet of paper can also work well.
Calibrate Extrusion Steps
Extruder calibration ensures the printer feeds the correct length of the filament. Over-extrusion leads to blobby surfaces, while under-extrusion yields weak or incomplete layers.
Keep Filament Dry
The moisture-laden filament can bubble and sizzle during printing, causing inconsistent extrusion. Storing spools in airtight containers with desiccant extends their shelf life.
Success Tip: Create a small test print—like a calibration cube—whenever you switch materials or drastically change settings. This quick test verifies you’re on the right track.
Industrial 3D Printing Applications
While hobby printers get a lot of attention, industrial 3d printing machine setups handle large production runs and specialized materials.
Prototyping
Companies test new product designs rapidly. They can refine shapes, test functionality, and correct flaws before committing to expensive tooling or molds.
Low-Volume Manufacturing
For niche or custom items, 3D printing can outshine traditional mass production. It avoids the need for multiple molds, letting businesses quickly pivot or personalize parts.
Aerospace And Medical
From custom implants to lightweight aircraft components, these fields push the boundaries of 3D printing’s potential. High-end metal or resin printers meet rigorous standards for safety and performance.
Conclusion
So, how does a 3D printing machine actually work? In essence, it’s all about layer-by-layer building based on digital blueprints. A slicer software takes your 3D model and converts it into thin layers. The 3D printing machine then follows these instructions, depositing or curing material one level at a time. Different machines use various materials—like plastic filament, liquid resin, or even metal powder—but the concept remains the same: an additive process where each layer fuses to the last.
By properly handling the design phase, slicing parameters, and final post-processing steps, you can create high-quality prints in shapes that might be impossible with traditional methods. The result? A fast, flexible way to turn imagination into physical reality. For enthusiasts and industry giants alike, 3D printing machines open countless possibilities.
FAQs
How long does it take to print a typical object?
It varies by size, layer height, and material. Something small could take under an hour, while a large, detailed model might run for several days.
Are 3D-printed parts strong enough for functional use?
Yes, depending on the filament or resin. PLA is decent for prototypes, while PETG or nylon handles more stress. Metal 3D printing can produce fully functional components.
Do I need special ventilation for 3D printing?
It’s wise to have good airflow, especially with ABS or resin printers that emit fumes. A well-ventilated area or enclosed printer helps keep air quality safe.


