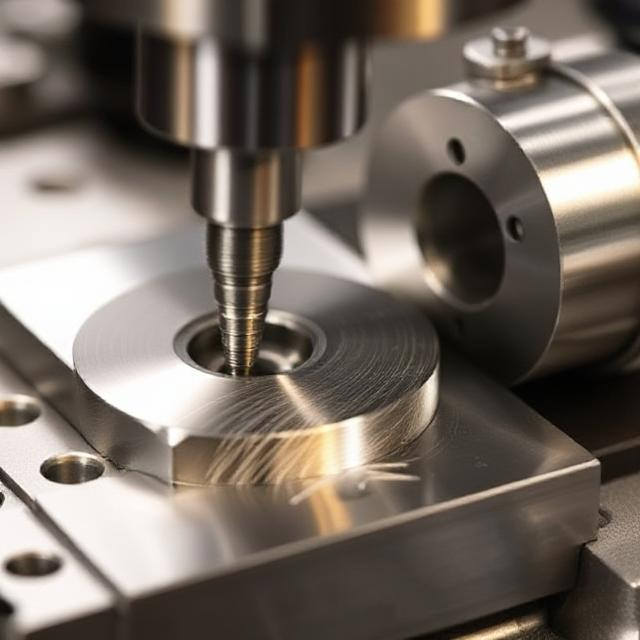
You might be wondering why there’s so much fuss about machining tolerances. After all, we often hear about measurements and precision in manufacturing, but the details can sometimes feel overwhelming. The biggest question on your mind might be: “What are the industry Standards Machining Tolerances all about, and why do they matter so much?”
The short answer? Standards Machining Tolerances ensure parts fit together and function as intended. They help manufacturers deliver consistent quality, reduce errors, and keep costs predictable. By knowing the right tolerance levels, you can avoid costly remanufacturing, enhance product performance, and maintain quality control from start to finish.
In this article, we’ll dive deep into what these Standards Machining Tolerances entail, why they are critical, and how you can make the best use of them. We’ll explore common tolerance ranges, practical tips, cost considerations, and more. Let’s get started!
Standards Machining Tolerances: The Cornerstone Of Precision
Picture a world without consistency in manufacturing. Components would never align, products would fail, and chaos would reign in workshops everywhere. That’s why Standards Machining Tolerances act like a universal language. They guide everyone from engineers to machinists, ensuring each part is made within acceptable limits. By following these standards, your parts will fit snugly, function properly, and endure the rigors of real-world use—making life easier for everyone in the chain of production.
The Role Of Tolerance Levels
Tolerance levels are the guardrails of manufacturing. They define how “off” a measurement can be from the ideal specification before a part fails to perform its job. They keep our designs realistic and our products dependable.
How Tolerances Affect Costs
Looser tolerances can mean easier production and lower costs. Tight tolerances might be pricier but ensure greater precision. Balancing these factors helps you find that sweet spot between budget and performance.
Importance Of Industry Certifications
Certifications like ISO and ASME are not just fancy labels. They confirm that manufacturers follow recognized rules and processes. By working with certified partners, you can trust that their Standards Machining Tolerances align with global benchmarks.
Common Tolerance Ranges For Different Methods
Different machining methods come with different standard tolerances. For instance, CNC milling can achieve tighter tolerances than standard drilling. Meanwhile, 3D printing often has more variability.
Below is a simple table that highlights typical tolerance ranges for popular machining methods. Keep in mind these numbers can vary based on equipment quality and material selection:
| Machining Method | Typical Tolerance Range | Notes |
|---|---|---|
| CNC Milling | ±0.005″ to ±0.010″ (0.127–0.254 mm) | Excellent for detailed, precise parts. |
| CNC Turning | ±0.002″ to ±0.005″ (0.051–0.127 mm) | Ideal for cylindrical parts and shafts. |
| 3D Printing (FDM) | ±0.010″ to ±0.020″ (0.254–0.508 mm) | Layer lines can affect surface finishes. |
| Laser Cutting | ±0.005″ (≈0.127 mm) | Great for sheet metal or thin materials. |
| Standard Drilling | ±0.010″ to ±0.015″ (0.254–0.381 mm) | Hole precision can vary with bit wear. |
Info Box: If you need extremely tight Standards Machining Tolerances for specialized parts, consider advanced methods like electrical discharge machining (EDM) or high-precision grinding.
Factors That Impact Machining Tolerances
Many factors can influence whether a part meets the desired tolerance. Machine calibration, tool wear, and even temperature in the workshop can make or break your final product. Here are a few key influences:
- Machine Condition – Older or poorly maintained machines may produce parts with inconsistent dimensions.
- Operator Skill – Human error is inevitable without proper training and oversight.
- Material Choice – Metals, plastics, and composites expand and contract differently.
- Cutting Speeds – Going too fast or too slow can affect precision and surface finish.
Quick Tip: Always account for thermal expansion if you’re machining in an environment where temperatures fluctuate significantly. This can help you maintain more accurate Standards Machining Tolerances.
Material Considerations In Tolerance Decisions

Different materials handle stress, heat, and machining processes in unique ways. Soft materials like aluminum may be easier to shape but can also deform if clamped too tightly. Hard materials like stainless steel or titanium resist wear but can be tricky to cut. Each choice affects how reliable your parts remain within the Standards Machining Tolerances you set.
Suggestion Box: If you’re working with a new or unfamiliar material, do a small pilot run first. This helps you gather data on how the material behaves under various cutting conditions.
Measuring Tools And Techniques
Accurate measurement tools are vital for confirming that parts meet Standards Machining Tolerances. Calipers and micrometers are the go-to for smaller dimensions. Coordinate Measuring Machines (CMM) come in handy for complex geometries. Optical comparators and laser scanners can also detect minuscule deviations.
In each case, the goal is to confirm that your part is within those crucial limit values. A slight miscalculation can lead to a chain reaction of expensive mistakes.
Fact Box: High-quality digital measuring devices, although costlier, often eliminate the guesswork involved in reading analog scales.
GD&T Essentials You Should Know
Geometric Dimensioning and Tolerancing (GD&T) is a system that describes and communicates engineering tolerances. Instead of relying on basic dimensional tolerances, GD&T uses symbols to specify the shape, orientation, and location of features on a part.
It includes concepts like:
- Straightness, Flatness, and Roundness – Ensuring geometric accuracy.
- Parallelism and Perpendicularity – Controlling the relationship between features.
- Position Tolerancing – Defining how far a feature can shift from its ideal position.
By integrating GD&T, you enhance clarity and reduce misinterpretation, ensuring parts meet the desired Standards Machining Tolerances more reliably.
Cost Implications Of Tight Tolerances
Tight tolerances often require advanced equipment, rigorous inspections, and more time. This inevitably raises production costs. While achieving micrometer-level precision might sound appealing, it can be excessive if the part’s function doesn’t demand it.
Danger Box: Over-specifying Standards Machining Tolerances can lead to needlessly high budgets. Always weigh the functional needs of your design before tightening the tolerance.
Balancing Quality And Efficiency
The best manufacturers blend high quality with efficient processes. They don’t chase the tightest possible tolerances when a slightly looser range will do just fine. This balance maximizes resources and ensures products meet performance criteria without draining the budget.
In many applications, you only need to meet the minimum tolerance requirement that guarantees safety and function. Pushing for smaller margins can be more about marketing hype than practical benefits.
Tips For Maintaining Consistency
Consistency is key to applying Standards Machining Tolerances effectively. If your first batch of parts is perfect but the next ten are off, you could end up with huge rework costs. Here are some tips:
- Regular Calibration – Keep all gauges and instruments calibrated.
- Document Processes – Write down the settings, feeds, and speeds that work best.
- Train Staff – Ensure everyone understands the importance of measurement and tolerance.
- Preventive Maintenance – Schedule routine check-ups on machinery to reduce unexpected errors.
Warnings Box
Ignoring preventive maintenance is a fast track to inconsistent part production and costly downtime.
Real-World Examples Of Tolerance Selection
In automotive applications, brake system components typically demand tighter tolerances for safety. In contrast, parts used in simple enclosures might allow more leeway. Aerospace parts often require extremely tight Standards Machining Tolerances due to high stress and safety considerations.
By examining real-world examples, it becomes clear that the target tolerance depends heavily on function. Always tailor your tolerance approach to match your project’s unique needs.
Troubleshooting Tolerance Issues
Ever faced the frustration of parts that won’t fit together? Troubleshooting can help pinpoint why your parts are off-spec. Begin by isolating each variable:
- Recheck The Drawing – Are the dimensions correct?
- Inspect The Machine – Any sign of misalignment?
- Verify Measurements – Could the measuring tool be inaccurate?
- Evaluate The Material – Is it warping under stress or heat?
If the above checks out, consider environmental factors like humidity or temperature, which can subtly alter materials and machines alike.
Benefits Of Standardization In Machining
When everyone follows the same playbook, life gets simpler. Standardization creates a common language between designers, engineers, and manufacturers. This reduces confusion, speeds up production, and fosters trust. Plus, standardized Standards Machining Tolerances often mean you can switch suppliers without worrying about massive quality shifts.
Info Box: According to the International Organization for Standardization (ISO), standardized manufacturing practices help reduce waste and improve overall quality worldwide.
How Technology Improves Tolerance Control
Modern technology has supercharged the way we achieve and verify Standards Machining Tolerances. Computer-aided manufacturing (CAM) software allows precise control over toolpaths, while real-time sensors can measure machine performance on the fly. Robotics can automate the loading and unloading of parts, reducing human error.
Suggestion Box: If you’re looking to tighten tolerances without skyrocketing costs, invest in machine upgrades that offer real-time adjustments and advanced monitoring systems.
Working With Suppliers For Best Results
If you outsource production, clear communication is vital. Provide detailed drawings, specify the exact tolerance requirements, and confirm the supplier has the necessary certifications. Regular quality checks and audits can prevent surprises later.
Explain upfront why a certain tolerance is critical. When your supplier understands the function of the part, they can apply the correct Standards Machining Tolerances more effectively.
Conclusion
The quest to understand and apply Standards Machining Tolerances boils down to ensuring parts fit, function, and hold up under real conditions. Getting this right involves balancing precision with practicality, factoring in costs, and leveraging modern technology. By following recognized standards, you avoid production headaches and deliver products that stand the test of time.
Remember, the ultimate goal is to meet your part’s requirements without overcomplicating the process. Whether you’re fine-tuning an aerospace component or making a simple bracket, the right tolerance choice can save you time, money, and unnecessary stress.
FAQ
Q: Why are machining tolerances necessary in manufacturing?
They ensure parts can fit together reliably, function correctly, and meet safety standards. Without tolerances, parts would likely vary too much and cause product failures.
Q: How do I pick the best tolerance range for my part?
Consider the part’s purpose, the materials used, and budget constraints. Consult design guidelines or engineering references for typical tolerances based on similar parts.
Q: Can I reuse tolerance values from a different project?
Sometimes, yes. However, verify that the new project has similar requirements. Tolerance needs can vary widely depending on design function and material type.


